

Fuser Setup
This guide will cover the cabling and setup process for the Dichen 6th gen hdmi fuser.
Resolution check
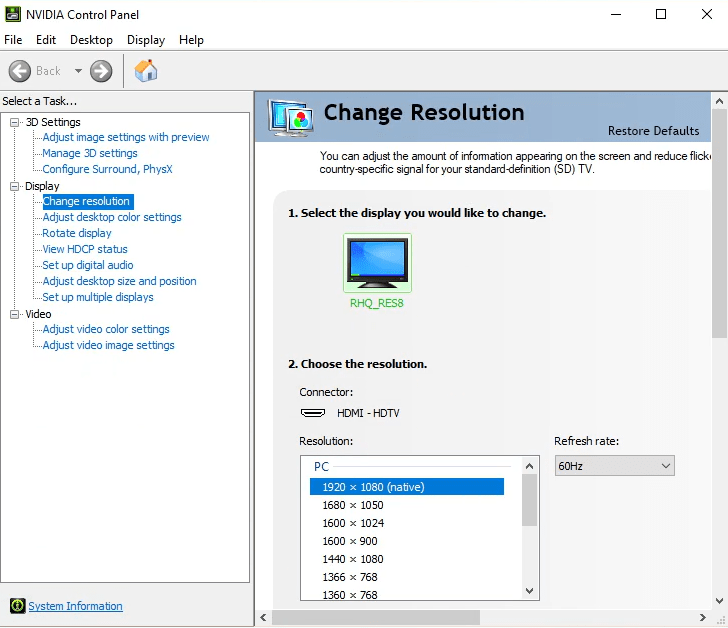
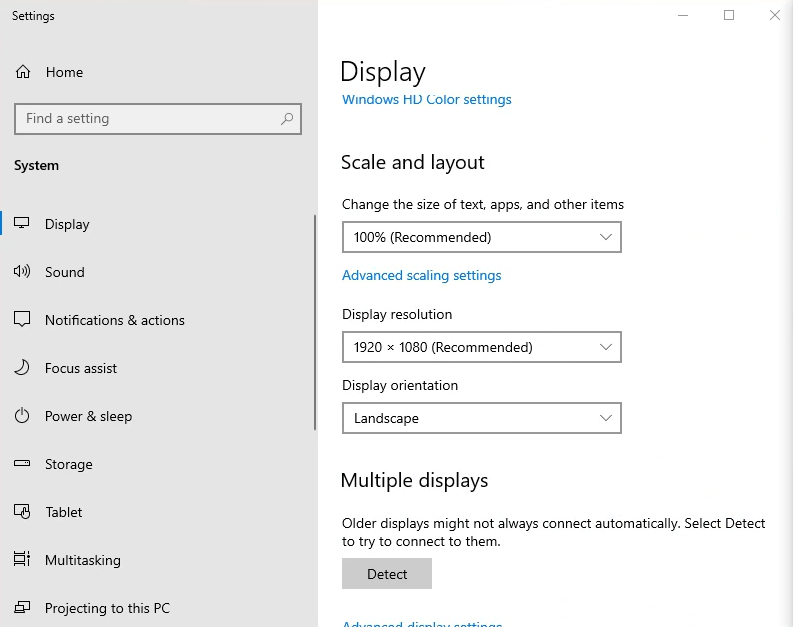
Before doing anything with the fuser. Ensure that the two systems you intend on using with the fuser are set to the same resolution and refresh rate.
Hardware Install
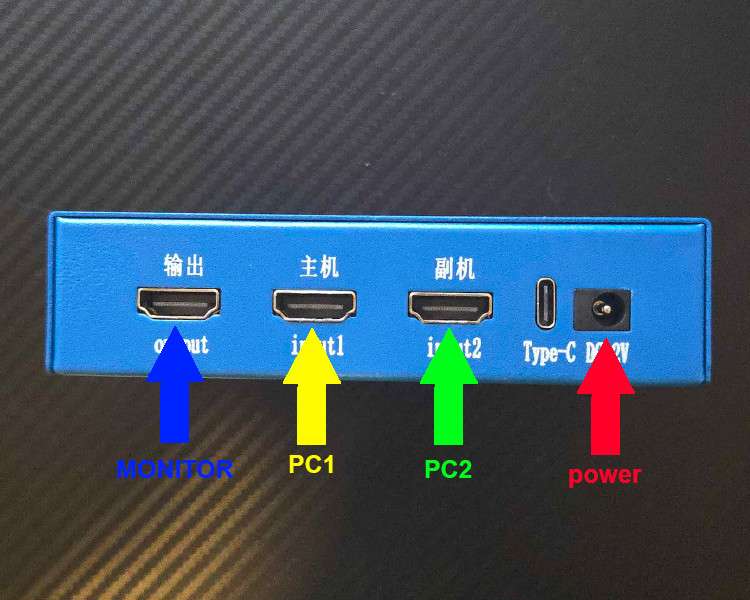
Plug your main display that you intend on using throughout your experience to the BLUE indicated HDMI port.
From your main PC plug a HDMI cable from either your GPU or motherboard into the YELLOW labelled HDMI port.
From your 2nd PC plug a HDMI cable from either your GPU or motherboard into the GREEN labelled HDMI port.
Using the provided power cable, plug in the Fuser to the RED colored power port.
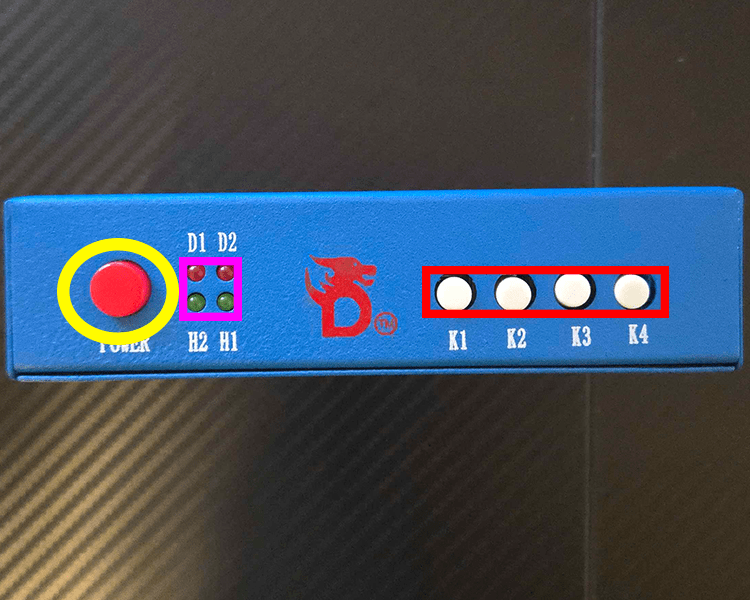
YELLOW: Power button for the fuser
PINK: Status lights
D1: Power; Faded red when the fuser is off/standby. Bright red when the fuser is turned on.
D2: Active fusion; When the fuser is actively combining both displays, this light will be solid red, otherwise this light will not be on.
H2: HDMI port 2 status (Green labelled port from above)
H2: HDMI port 1 status (Yellow labelled port from above)
RED: Fuser control buttons
K1: Change resolution.
K2: Adjust lower layer display overlay strength.
K3: Reset lower layer overlay strength.
K4: Toggle between fusion, HDMI 1, and HDMI 2.
Troubleshooting
Desktop Apps Are Merged / Two Search Bars Visible
Press K2 (Main Screen Mode) when no overlay is active.
Second Monitor Shows 'No Signal'
Ensure the 2nd monitor is turned on.
The 2nd monitor should be connected to its respective PC, not the Fuser.
Refresh Rate Issues (Limited to 60Hz or 90Hz)
This indicates not all HDMI cables are HDMI 2.0.
Use three HDMI 2.0 cables for the Fuser setup.
Important Notes
The Fuser requires 3 HDMI 2.0 cables for full functionality.
Once set up correctly, switching modes (K1/K2/K3) will allow seamless integration between both PCs.
Last updated